
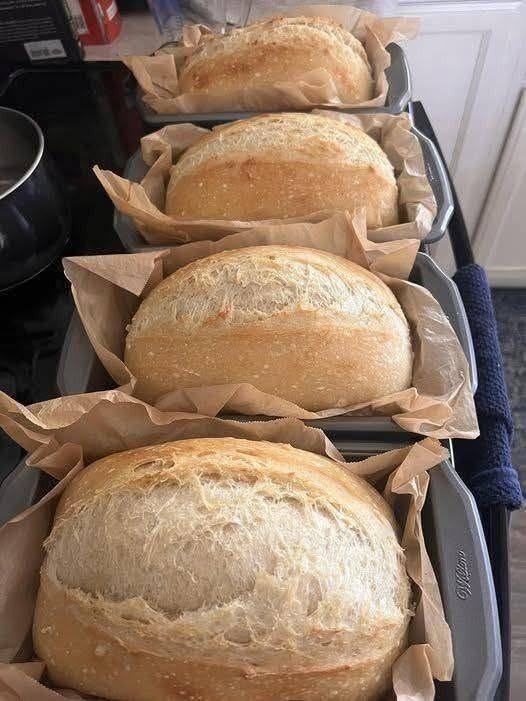
There is few things in the culinary world as comforting and rewarding as the aroma of freshly baked bread wafting through the kitchen. From crusty artisan boules to tender sandwich loaves baked neatly in pans, home baking has experienced a massive resurgence as people rediscover the simple joy of creating wholesome food from scratch.
When you see a row of golden, perfectly risen loaves cooling in parchment-lined baking pans, it inspires an immediate desire to preheat the oven and start kneading. Baking bread at home is not only a wonderful creative outlet, but it also allows complete control over ingredients, ensuring a nutritious product free from artificial preservatives and chemical additives.
In this comprehensive guide, we explore the history of bread making, the science of yeast fermentation, a step-by-step master recipe for baking beautiful loaves in pans, and practical tips to ensure baking success every time.
The Science of Bread Making: Understanding Flour, Yeast, and Water
Baking is often described as a science, and nowhere is this more accurate than in the art of bread making. Every ingredient plays a precise chemical and structural role in creating the final loaf.
1. Flour and Gluten Development
Wheat flour contains two vital proteins: glutenin and gliadin. When mixed with water and kneaded, these proteins bond together to form a stretchy, elastic network known as gluten. This gluten matrix traps the gas bubbles produced by yeast, allowing the dough to rise and maintain its shape during baking.
2. Yeast Fermentation
Yeast is a microscopic living organism that feeds on sugars present in the flour. During fermentation, yeast consumes sugars and releases carbon dioxide gas and ethanol, which create the airy texture and distinct flavor profile of traditional bread.
+--------------------------+--------------------------------------------------------------+
| Ingredient               | Primary Function in Bread Baking                             |
+--------------------------+--------------------------------------------------------------+
| Bread Flour              | Provides structural protein (gluten) for rising              |
| Water or Liquid          | Hydrates flour, activates gluten, and dissolves yeast        |
| Yeast                    | Ferments sugars to produce carbon dioxide gas                |
| Salt                     | Strengthens gluten network and regulates fermentation speed  |
+--------------------------+--------------------------------------------------------------+
Financial, Health, and Lifestyle Advantages of Baking at Home
Beyond the undeniable pleasure of tasting warm, fresh bread, baking at home offers substantial practical and economic benefits for households.
1. Significant Grocery Savings
Store-bought artisan bread and specialty organic loaves can be surprisingly expensive. Buying bulk flour, yeast, and salt allows you to bake premium-quality bread at a fraction of retail store prices.
2. Nutritional Control and Clean Ingredients
Commercial breads often contain added sugars, sodium, dough conditioners, and chemical preservatives to extend shelf life. Baking at home gives you 100% control over what goes into your food, supporting a cleaner, healthier diet.
Master Recipe: Golden Artisan Loaves in Loaf Pans
This simple yet foolproof method yields multiple golden loaves with a crisp crust and soft, fluffy interior, baked conveniently in standard metal loaf pans.
Ingredients Needed:
-
6 cups unbleached bread flour
-
2 1/4 cups warm water
-
1 packet (2 1/4 teaspoons) active dry yeast or instant yeast
-
2 tablespoons honey or organic sugar
-
1 tablespoon sea salt
-
Parchment paper for lining the pans
Step-by-Step Instructions:
Step 1: Mix and Knead the Dough
In a large mixing bowl, combine warm water, yeast, and honey, letting it sit for 5 minutes until frothy. Add flour and sea salt. Knead the mixture by hand or with a stand mixer for 8 to 10 minutes until the dough becomes smooth, elastic, and slightly tacky.
Step 2: First Rise (Bulk Fermentation)
Cover the bowl with a clean damp towel or plastic wrap. Allow the dough to rise in a warm, draft-free spot for 1 to 2 hours, or until doubled in size.
Step 3: Shape and Place in Pans
Punch down the dough gently and divide it into equal portions. Shape each portion into an oblong loaf and place them into metal loaf pans lined with parchment paper. Allow the shaped loaves to rise a second time for 45 to 60 minutes.
Step 4: Bake to Golden Perfection
Preheat your oven to 425°F (220°C). Score the top of each loaf with a sharp knife or razor to allow for even expansion. Bake for 30 to 35 minutes until the crust turns a deep golden brown and sounds hollow when tapped on the bottom. Cool completely on a wire rack before slicing.
Practical Tips for Perfect Bread Baking
-
Measure Ingredients Accurately: Use a digital kitchen scale to weigh flour rather than scooping with cups, as excess flour results in dense, heavy bread.
-
Control Room Temperature: Yeast thrives in warm environments. If your kitchen is cool, let your dough rise inside a turned-off oven with the internal light switched on.
-
Use Parchment Paper: Lining your loaf pans with parchment paper prevents sticking and makes removing hot baked loaves effortless.
Fascinating Facts About Bread History
-
Ancient Roots: Bread is one of the oldest prepared foods in human history, with archaeological evidence showing humans making flatbreads over 14,000 years ago.
-
The Staple of Civilization: Ancient Egyptian workers were famously paid wages in rations of bread and beer.
-
Chemical Leavening Evolution: Before commercial active dry yeast was invented, bakers relied entirely on wild sourdough starters captured from ambient airborne yeasts.
Frequently Asked Questions (FAQ)
Why did my bread turn out dense and heavy?
Dense bread is usually caused by using too much flour, insufficient kneading, or dead yeast that failed to ferment and create gas bubbles.
Can I freeze homemade bread?
Yes! Homemade bread freezes exceptionally well. Slice the loaf completely, wrap it tightly in plastic wrap and foil, and freeze for up to 3 months.
Do I need a special bread pan to bake loaves?
Standard metal loaf pans work wonderfully, especially when lined with parchment paper to ensure easy release.
How should I store freshly baked bread?
Store cooled bread in a paper bag or a bread box to maintain a crisp crust. Avoid storing fresh bread in the refrigerator, as it causes the crumb to dry out rapidly.
Conclusion
Baking your own artisan bread in loaf pans is a deeply satisfying culinary tradition that connects us to generations of home bakers. With simple ingredients, basic equipment, and a little patience, you can pull gorgeous, golden loaves out of your oven that rival any professional bakery.
Embrace the joy of baking today, fill your home with the comforting aroma of fresh bread, and enjoy the delicious rewards of your kitchen craftsmanship!
