
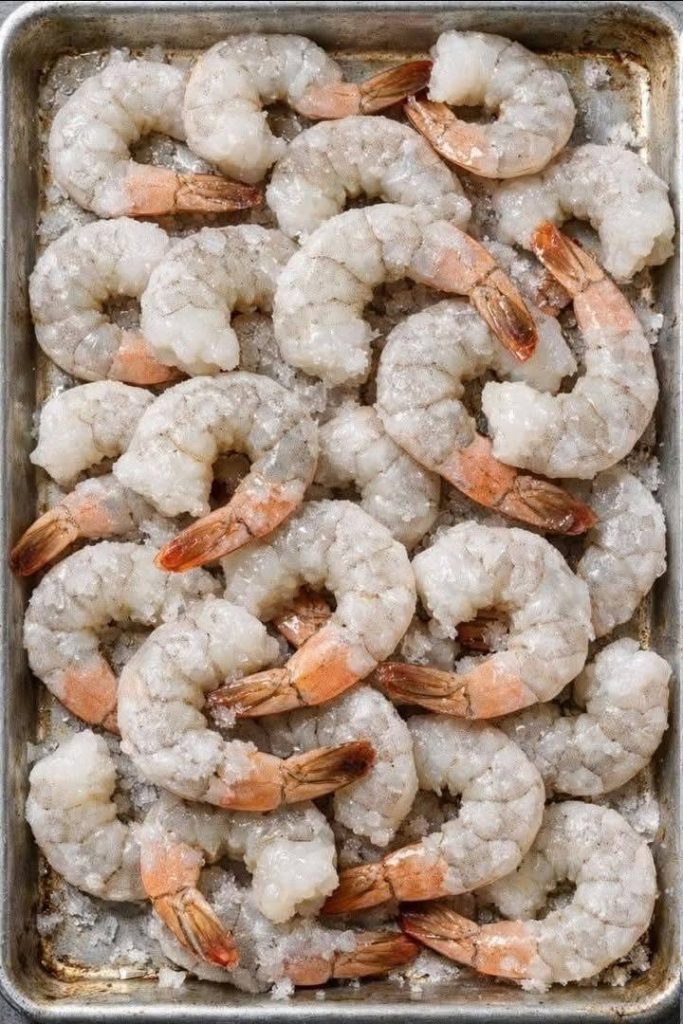
Shrimp is one of the most beloved and fast-cooking proteins on the planet, making it a staple for quick weeknight dinners, seafood boils, pasta dishes, and outdoor summer grilling. However, cooking shrimp to absolute perfection can be surprisingly tricky. All too often, shrimp cooked at home turns out rubbery, dry, tough, or mushy, lacking the satisfying, plump “snap” you experience at high-end seafood restaurants and steak houses.
Fortunately, world-class chefs and food scientists have relied on a simple, inexpensive kitchen trick for years: dry-brining raw shrimp with coarse salt and baking soda. This effortless 15-minute prep technique transforms inexpensive raw shrimp into incredibly juicy, tender, and snappy bites that hold onto moisture even when seared or grilled over high heat.
In this ultimate guide, we dive deep into the chemical science of dry-brining shrimp, provide step-by-step preparation instructions, explore essential buying and thawing tips, discuss health and dietary benefits, and share valuable kitchen insights to elevate your seafood cooking.
The Science: Why Salt and Baking Soda Work Wonders
To understand why this simple technique works so effectively, it helps to examine how salt and alkaline compounds interact with animal protein fibers on a microscopic level.
1. How Coarse Salt Retains Moisture
When raw shrimp are coated with salt, the salt draws out surface moisture initially. However, as the salt dissolves into that moisture, it creates a concentrated brine that gets reabsorbed into the muscle tissue of the shrimp. This process breaks down dense muscle proteins (specifically myosin), preventing them from contracting too tightly when heated. As a result, the shrimp retains its moisture during cooking rather than squeezing out water and turning dry or rubbery.
2. How Baking Soda Creates the Signature “Snap”
Baking soda (sodium bicarbonate) is an alkaline substance. Raising the pH level on the exterior surface of the shrimp alters the structure of the proteins in two distinct ways:
-
Textural Crispness: Higher pH levels prevent the proteins from bonding tightly together, keeping the flesh firm, plump, and pleasantly springy (giving it that sought-after restaurant “snap”).
-
Enhanced Browning (The Maillard Reaction): Alkaline environments accelerate the Maillard reaction—the chemical reaction between amino acids and reducing sugars that produces rich browning and savory, complex flavors when cooked at high heat.
Step-by-Step Guide: How to Dry-Brine Shrimp Like a Chef
This foolproof method takes less than 20 minutes and requires only basic pantry staples.
Ingredients Needed:
-
1 pound raw shrimp (peeled and deveined, tails on or off)
-
1 teaspoon kosher salt (or 1/2 teaspoon fine sea salt)
-
1/4 teaspoon baking soda
Step 1: Prep and Dry the Shrimp
Rinse peeled and deveined raw shrimp under cold running water. Pat them thoroughly dry with paper towels. Removing excess surface water ensures the salt and baking soda adhere directly to the shrimp flesh without dissolving into a diluted pool.
Step 2: Toss with Salt and Baking Soda
Place the dried shrimp into a mixing bowl or onto a rimmed baking sheet. Sprinkle the kosher salt and baking soda evenly over the shrimp. Toss thoroughly with your hands or tongs to ensure every single shrimp is lightly coated.
Step 3: Rest and Chill
Let the tossed shrimp rest in the refrigerator for 15 to 30 minutes.
Important Note: Do not leave shrimp in a baking soda brine for longer than 30 to 45 minutes! Excessive exposure to sodium bicarbonate can break down the surface proteins too much, resulting in a chemical aftertaste or a slippery texture.
Step 4: Rinse (Optional) and Cook
After 15 to 30 minutes, you can pat the shrimp dry again (or give them a quick rinse under cold water and pat thoroughly dry) before seasoning them with your favorite herbs, spices, garlic, or marinades. Proceed to cook using high-heat methods such as pan-searing, grilling, sauteing, or baking.
Best Cooking Methods for Brined Shrimp
Once your shrimp are properly brined, high-heat and fast cooking techniques yield the absolute best results.
1. High-Heat Pan-Searing
Heat a heavy cast-iron skillet or stainless steel pan over medium-high heat with olive oil or butter. Add the shrimp in a single layer without overcrowding the pan. Cook undisturbed for 1 to 2 minutes until a golden-brown crust forms, flip, and cook for another 1 to 2 minutes until opaque throughout.
2. Outdoor Grilling
Thread the brined shrimp onto wooden or metal skewers to prevent them from falling through the grill grates. Brush with melted garlic butter or olive oil and grill over high heat for roughly 2 minutes per side until charred and cooked through.
3. Air Frying
Preheat your air fryer to 400°F (200°C). Lightly spray the air fryer basket with non-stick oil spray. Toss the brined shrimp with seasoning and air fry for 5 to 7 minutes, shaking the basket halfway through for evenly cooked, crispy bites.
Nutritional Benefits and Health Advantages of Shrimp
Incorporating shrimp into your regular weekly meal plan provides exceptional nutritional benefits that support long-term physical health, energy levels, and overall wellness.
Low-Calorie, High-Protein Powerhouse
Shrimp is exceptionally lean, offering one of the highest protein-to-calorie ratios among all seafoods. A standard 3-ounce serving delivers nearly 20 grams of high-quality complete protein with under 90 calories and virtually zero carbohydrates, making it an ideal choice for weight management, athletic muscle recovery, and keto or low-carb diets.
Packed with Vital Antioxidants and Minerals
-
Astaxanthin: This powerful carotenoid antioxidant gives shrimp its reddish pigment when cooked. Astaxanthin has been shown to support cellular health, reduce systemic inflammation, and protect skin health against UV damage.
-
Selenium: A crucial mineral that supports healthy thyroid gland function, boosts immune defenses, and protects against oxidative stress.
-
Vitamin B12: Essential for proper nerve function, brain health, and red blood cell production.
Focusing on clean, nutrient-dense protein choices supports long-term preventive health, helping lower the incidence of chronic metabolic issues and reducing future medical expenses, hospital care, and long-term prescription costs.
Financial Wisdom: Buying, Storing, and Grocery Budgeting
Maximizing value in the kitchen requires understanding how to purchase and store seafood efficiently without overspending.
Buying Fresh vs. Frozen Shrimp
Unless you live directly on the coast near active fishing ports, almost all “fresh” raw shrimp displayed on ice at grocery store seafood counters was previously frozen at sea and thawed in-store.
Purchasing frozen, wild-caught or sustainably farmed shrimp in bulk bags is almost always significantly cheaper and yields higher quality, as you can thaw the exact portion you need right before cooking.
Managing Household Budgets and Smart Spending
Applying strategic grocery shopping habits—such as stocking up on frozen seafood during sales—helps lower overall monthly household expenses. Managing your daily food budget creates financial flexibility, allowing families to build emergency funds, manage monthly Mortgage or rent payments, handle personal Credit or Loan obligations, and allocate savings toward future Investment and Retirement goals.
Maintaining sound personal Finance practices alongside healthy home-cooking habits ensures both your physical and financial health remain strong and stable.
Practical Tips for Buying and Thawing Shrimp
-
Check the Count Size: Shrimp are sold by weight-count numbers (e.g., 21/25 or 16/20). Lower numbers mean larger individual shrimp per pound (e.g., 16/20 count means there are 16 to 20 large shrimp per pound).
-
Thaw Slowly in Cold Water: The safest and fastest way to thaw frozen shrimp is placing them in a colander submerged inside a bowl of cold tap water for 10 to 15 minutes. Never thaw shrimp in hot water or at room temperature, which encourages bacterial growth.
-
Avoid Added Sodium Phosphates: Look at ingredient labels on frozen shrimp packages. Avoid packages containing sodium tripolyphosphate (STPP), a chemical additive used to forcibly hold water weight in shrimp, which can dilute natural flavor and lead to a mushy texture.
Fascinating Facts About Shrimp
-
Thousands of Species: There are over 2,000 different species of shrimp found worldwide in both freshwater and saltwater marine environments.
-
Rapid Heartbeat: A shrimp’s heart is located in its thorax, which is part of its head structure!
-
Global Seafood Leader: Shrimp is consistently ranked as the single most consumed seafood item in the United States, surpassing both tuna and salmon in popularity.
Frequently Asked Questions (FAQ)
Can I use baking powder instead of baking soda for brining shrimp?
No. Baking powder contains added acids (like cream of tartar) and cornstarch, which will not raise the pH level properly. You must use pure baking soda (sodium bicarbonate).
Do I need to rinse the baking soda off the shrimp before cooking?
If you used the recommended amount (1/4 teaspoon per pound), rinsing is optional, though a quick rinse followed by thorough drying with paper towels ensures no metallic or salty taste lingers.
How do I know when shrimp are fully cooked?
Cooked shrimp curl into a soft “C” shape and turn opaque pink/white throughout. If shrimp curl tightly into a closed “O” shape, they are overcooked!
Can I brine cooked shrimp with baking soda?
No. This technique only works on raw, unheated shrimp protein structures prior to cooking.
Conclusion
Elevating your home seafood dishes does not require expensive gadgets or complicated culinary skills. By applying a quick, 15-minute dry brine of coarse salt and baking soda, you can unlock tender, plump, and snappy restaurant-quality shrimp every single time. Combine this clever kitchen secret with smart grocery buying strategies to enjoy delicious, healthy, high-protein meals that satisfy your taste buds and support your family budget.
